
By Linda Davey.
Sometimes you have to recognize the signs that it’s time to try something new in the kitchen. For me, there were three distinct clues that I should try baking with freshly milled grains.
First, there was spent grain. What is spent grain? It’s what’s left after you make wort in the beer brewing process. My husband is a homebrewer, and when brewing beer, you start with a variety of malted barley and steep it in hot water, like making tea. Once you strain the liquid from the barley mash, you’re left with some pretty wet grains, or spent grains. Initially, we composted it, but there’s lots you can do with your spent grain, and we began to dry the grain. Initially, I used it to make dog cookies, but wondered if it held any value as flour, so I bought the grain mill attachment for my mixer and tried small quantities in a batch of cookies. The result was what remains a family favorite cookie.
Then a friend invited me to meet her at One Mighty Mill in Lowell for coffee. I gave her sourdough starter, and she bought me a 5 pound bag of their freshly milled flour. I immediately baked a loaf of sourdough using only this flour and fell in love with the nutty flavor and chewy texture of the loaf. This wasn’t the heavy, hard, whole-wheat bread I remembered from my childhood.
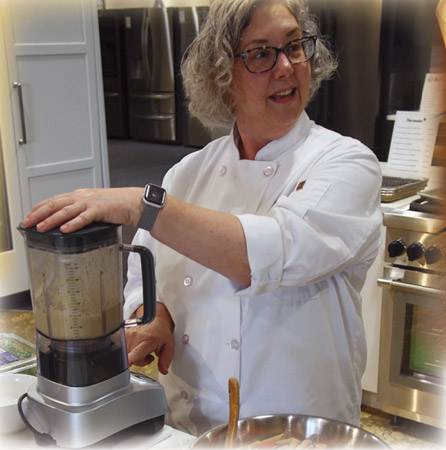
Linda Davey demonstrates the cookie recipe.
And finally, there was an Instagram post and news story about a Cambridge-based baking supply store (Elmendorf ) that offered freshly milled and whole grains, among other fun baking supplies. Since my son lived in Cambridge at the time, it was only natural to take a little field trip. I was excited to try it and had even seen that at one time a famous Boston bakery had exclusively used flour milled by Elmendorf. Starting with a pound of Red Fife (my research revealed this would be a good sourdough grain) and my grain mill attachment, it was back to the sourdough recipe. My recipe called for a combination of whole wheat and bread flours, so I set to work and started measuring, using the freshly ground Red Fife where whole wheat was called for.
Mulling Milling
Immediately, the questions began in my head. What did I know about milling my own grains? Coarse or fine? What about sifting? I realized just how much I didn’t know about flour. More questions. How much to mill? Should I mill all of the grains or only what I needed? I decided on the latter since my research indicated that whole grains last longer than milled flour. And no sifting—I was substituting for the whole wheat in my recipe, after all. With grains measured, milled, and measured again just to be sure, I was well on my way to one of my best sourdough loaves ever. It was chewy, nutty, and sweet, but not heavy. I was hooked and started experimenting with using the freshly milled grain in other baking projects.
Trial & Error
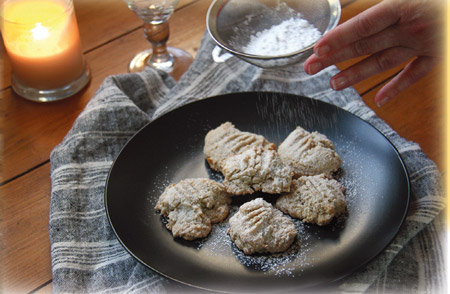
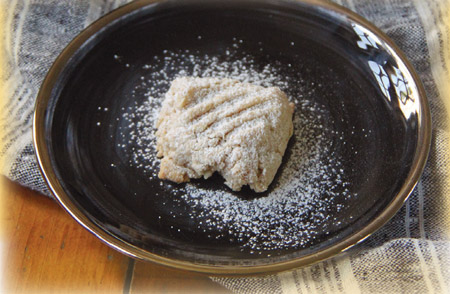
Spent grain cookies dusted with sugar.
One of the things to know about how I bake is that I do so by weight versus measure. I don’t scoop out 1 cup of flour, I weigh 125 grams of flour. Substituting the fresh-milled grain in recipes wasn’t always successful. Cakes and cookies don’t necessarily do well with whole grain flours. They often absorb different quantities of liquids, and the texture of the finished product isn’t necessarily what you might be used to, so I’ve had to adapt some things. After a little trial and error (I am by no means an expert; this is all based on my experiences), I found that in most bread recipes, substituting approximately 25% of the total flour with freshly milled grain and no other adjustments didn’t impact the result. The milled grain almost always weighed the same as the whole grain, which made it simple. If a recipe called for 400 grams of flour, I could use 100 grams of whole grain, mill it, and then add 300 grams all-purpose or bread flour, and continue with the recipe.
When to Sift
Sifting was required when looking for a softer texture or making cookies, cakes, or pie crusts. Sifting required additional calculations, so to keep things simple, I stuck with 25% fresh grain, milled, then sifted and weighed again. Here’s where things get tricky… once you sift the grain, it obviously weighs less than before you milled and sifted it. What is lost in sifting isn’t always the same amount (lots of factors here), so measure after sifting and make up the difference with all-purpose flour. For example, if a recipe calls for 240 grams of flour, measure 60 grams of whole grains, mill it, sift it, and measure again. If the new weight is 50 grams, add 190 grams of all-purpose flour and continue with the recipe. This process has generally worked well for me and allows me to account for some of the various fluctuations that happen when milling my grains.
Grain Storage
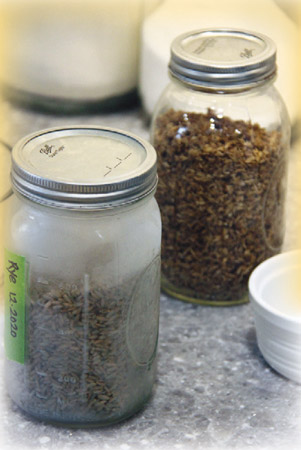
If you’re interested in milling your own grains or purchasing freshly milled grains, one of the most important things to consider is storage. Freshly milled grains often contain more oils than the bag of flour you buy at the grocery store. Those oils can cause the flour to go rancid. It is recommended that freshly milled grains be kept cool and dry. If you’ve ever read the bag of whole wheat flour you’ve purchased at the grocery store, it might recommend storing in the freezer. That’s where I keep mine, or in my basement in tightly sealed jars labeled with the variety and purchase date. If I mill extra grain, that goes in the freezer too and is labeled accordingly.
Kim VanWormer, the Miller at Plimoth Patuxet, shared that “the farm to table movement is just starting to include grain.”
Cold, Cold, Cold
Milling and sifting cold grains is much easier and has a better yield than warm grains. Grains milled straight from the freezer result in flour weighing the same as whole grains prior to sifting. If they’re warm, the grain may stick to the mill or not crush as finely, leaving you with a few grams less in the bowl. I spoke with Kim VanWormer, the Miller at Plimoth Patuxet, about this, and she shared the term “lively flour.” Lively flour has higher protein which results in more oven spring in your baked goods. Increased friction from dull mills or higher temperatures reduces this, so she agreed with my practice of keeping my whole grains cool and dry. She also recommended working in small batches to keep the temperature of the mill down. My mill states that it should not be operated for longer than 10 minutes without allowing it to cool down.
The Gristmill
The Gristmill at Plimoth Patuxet offers freshly milled corn, wheat, and rye for sale. The corn is primarily milled on the replica stone mill, powered by water. The water keeps the stones cool, and the stones are specially grooved for corn and separate the bran, so the resulting flour is whiter. The Gristmill also operates a smaller electric mill in the winter, or when milling wheat or rye, which are offered on a limited basis depending on availability. A variety of corn flours are available including organic yellow, blue corn (commonly grown here in the 17th century), and sampe (grits). Plimoth Patuxet is considering offering whole grains for sale as well. Gray’s Grist Mill in Westport, MA, also offers freshly milled johnnycake mix and pancake mix.
Whole grains are a bit harder to find in this area. As Kim said when we talked, “the farm to table movement is just starting to include grain.” She suggests trying cornbread, brown bread, or grits if you’re just starting to cook with freshly milled grains. If you’re interested in trying the cookie that started it all for me, I’m happy to share my recipe with you.
Almond Spent Grain Cookies
Ingredients
- 1 cup 125 grams all-purpose flour
- ¼ cup 30 grams spent grain flour (You can ask a local brewery to save you some grain and dry it yourself. Spread the grain in a thin layer on a rimmed baking sheet and place in a preheated 200-degree oven for approximately 2 hours, stirring occasionally. Allow to cool before milling.)
- 1 cup 115 grams almond flour
- ½ teaspoon Diamond Crystal Kosher salt
- 1 stick salted butter room temperature
- ¾ cup 164 grams organic sugar
- 1 egg beaten
- 2 teaspoons vanilla bean paste or 2 teaspoons vanilla extract
- 2 teaspoons almond extract
- Powdered sugar for dusting cookies
Instructions
- Preheat oven to 350 degrees.
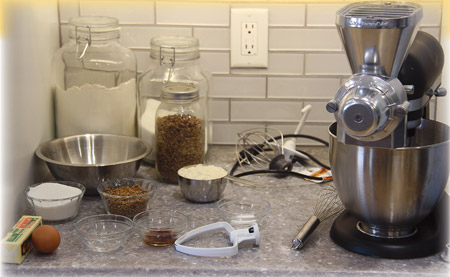
- In a medium bowl, combine all-purpose flour, spent grain flour, almond flour, and salt. Mix well and set aside.
- In the bowl of a stand mixer fitted with the paddle attachment, mix butter and sugar on low speed until just combined. Increase speed to medium high and beat until fluff y. Reduce speed to medium and beat in egg, vanilla bean paste, and almond extract. With mixer on low speed, add flour mixture approximately ½ cup at a time until fully incorporated.
- Using a cookie scoop, scoop dough onto a parchment-lined baking sheet, about 2 inches apart. Lightly press in one direction only with the tines of a fork.
- Bake 12 to 14 minutes, or until tops are barely golden. Transfer to wire rack to cool. Sprinkle with powdered sugar while still warm. Store at room temperature in a tightly sealed container.
Linda Davey is the Executive Chef at KAM Appliances where she loves to experiment with ingredients and learn from both failures and successes in the kitchen. You eat with your eyes and your nose as well as your mouth, so don’t be afraid to take the ugly cookie!


