by Paula Marcoux

Maintaining food traditions when you have migrated to a new country takes a lot of dedication and hard work, even today, when most any ingredient or equipment can be shipped to your door from the other side of the world. For Og Lim, whose Plymouth home is very distant in so many ways from her native Korea, it would be unthinkable to walk away from her food legacy. But that means she has to start from scratch to provide her table (which is a very hospitable and well-provided one) with the essential, foundational food that even most good cooks in Korea buy from professionals—kimchi.
The following recipe is the product of those years of experimentation and refinement. If you are already a kimchi aficionado, but have never tried to make it yourself, Og’s formula will set you up for success, even if you don’t have a nurturing family member on the other end of the phone. If you, on the other hand, are inexperienced with the stuff and wonder why on earth one would go to so much trouble to ferment some cabbage, consider two things: it’s super-delicious and super-healthful. High in fiber, vitamins, and most of all, probiotics, kimchi is now recognized as a terrific addition to the diet for the rest of us in the world who are just catching on.
I considered myself the luckiest person in town when I met Og last winter and she consented to teach me her kimchi method. Little did I suspect that this tutelage would require many long days of eating unbelievably great meals, foraging for ingredients hither and yon, drinking wine and singing karaoke late into the night, and generally having a terrific time. Og’s culinary homesteading, staking her claim to her own native tradition while tapping into our local bounty, would be a wonderful thing for her small circle of family and friends, if that’s where she kept it. But it’s the generous and creative act of sharing that legacy with the rest of us that really vaults her into the zone of creating community rather than just closing ranks with those who are already part of the tradition.
In her own words:
I have always been very interested in food and cooking, eastern or western, but I never thought I would make my own kimchi. Most of my friends in Korea do not make their own. It is a lot of work and you can buy pretty good tasting kimchi at market places these days.
Sometimes I would feel sad about my mom’s kimchi and other cooking of hers, because she is an excellent cook, and her kimchi was very well known among the people around us and I thought all her recipes would be forgotten someday. And why shouldn’t I try to learn her cooking while she could teach me?
So some years ago I started making my own kimchi occasionally, trying to follow my mom’s directions over the phone. Of course it was not easy. Sometimes I would get some pretty good ones, but mostly end up with not so good ones…
Every year during my parents’ visits my mom and I tried together making kimchi and I would taste the sauce that my mom made and try to remember the exact taste. It took 6-7 years for me to finally produce something similar.
Og Lim’s Kimchi
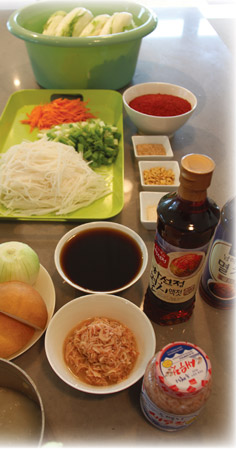
Phase I — Ingredients and equipment
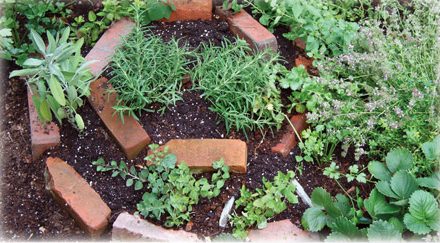
Like most culinary projects worth undertaking, making your own kimchi requires some advance logistics. You’ll need a scale, a blender or food processor, clean vessels of various sizes, and some large storage containers. A few key ingredients will take a little hunting, as neither the South Shore nor the South Coast is exactly rife with Korean grocery stores.* Most of the components of kimchi, however, are well represented at our fall farmers’ markets: napa cabbage, Korean or daikon radish, onion, scallions, garlic, carrots, and Asian pear.
Multiply or divide this recipe to make it work for you. Og says that in Korea, people traditionally made their biggest batches of the year in the autumn, putting up a bountiful harvest on a massive scale for the seasons to come. The trick, at least for those of us who do not have a dedicated kimchi cooler as Og does, is long-term storage. Maybe your fridge isn’t as full of weird projects as mine is, but I definitely need to take account of where the finished stuff will go when I plan a batch. Wouldn’t it be fun to solve this problem by burying a big clay jarful in the backyard, well below the frost line, after the old-school Korean fashion?
*You don’t have to travel far outside Plymouth and Bristol Counties. These three nearby stores stock everything you need and are rewarding destinations by themselves. And, of course, you can find all the Korean ingredients, and everything else in the world, for sale online.
- H-Mart, 581 Massachusetts Ave, Cambridge, MA 02139
- Asiana Market, 92 Warren Ave, East Providence, RI 02914
- Kam Man Foods, 219 Quincy Ave, Quincy, MA 02169
Phase II — Brining
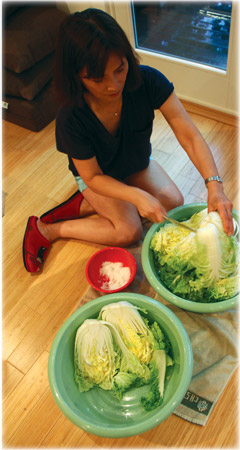
Make your 10% brine using salt and water. A ten percent brine means you use 100 grams of sea salt per each liter of water, since a liter conveniently weighs 1000 grams. (Ah, yes—the metric system is actually that, a system, not an arcane jumble of ancient multipliers like ours.)
To have enough to fully submerge all the cabbage, Og figures on 2 to 3 liters of water per each head (2 liters for a medium head, 3 liters for very large). So, for the sake of planning, that comes to 200 to 300 grams of salt per head, depending on size.
So let’s build this recipe around:
- 5 big solid heads napa cabbage
We then need:
- 15 liters cool water
- 1500 grams (1.5 kilos) sea salt
An extra-special twist for bold fermenters.
Lately, Og has been experimenting with basing her brine mix on our local Ellisville sea water. Apparently, all the trendy artisanal kimchi makers in South Korea are doing it these days. Why not take advantage of one of our most abundant local resources in this exciting way, too?
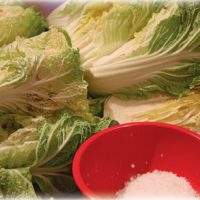
The seawater around here runs at about 3.5% salinity. Og wants the brine to be 10%, so she did a few calculations to figure out how much sea salt to add to bring it up to snuff. Unless you live on a pristine beach and are great at math like Og, I’d recommend making your first batch of kimchi using sea salt only.
The brining process. Quarter the napa cabbages carefully, so that each fourth maintains its integrity, more or less. Weigh out your salt and measure (or weigh) your water, and dissolve most of the salt in the water, holding back a few handfuls. Gently spread open the leaves of each cabbage quarter, and massage in a little of that reserved salt among the leaves. Layer them all up in a large non-reactive basin or tub and cover completely with brine. Weight down with another container (or clean plastic bag) full of water, so as to fully submerge the cabbage.
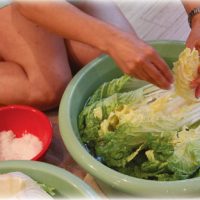
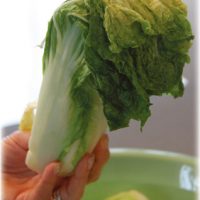
Leave in a cool place for between 8 and 12 hours, while the magic of osmosis occurs: as the salt penetrates the vegetable’s cells, much of the water departs, creating the characteristic addictive texture of kimchi. That time spread—8 to 12 hours—accounts for differences in the moisture content in the original cabbage, so you want to test it to judge its readiness, rather than just set a timer and robotically remove the stuff from the brine. This is how you tell: pick up a cabbage quarter by the base of the core and see how it droops. If the leafy top flops over pretty completely, you’re done. Drain it, rinse it in fresh cool water, and drain it again in a large colander or on a rack. Give it a little bit of a squeeze along the way to rid it of a bit more liquid.
(In the course of helping her with a batch of kimchi made-from small, young, tender heads of napa, I learned that Og has a special spidey sense. Apparently, her eyes flew open at 3:30 in the morning as the brining process was underway—she just knew it was ready early. She jumped out of bed to test the cabbage and found that her hunch was right. So she rinsed and drained it immediately, and it was fine waiting in that condition until morning. And she slept fine the rest of the night.)
Phase III — Mixing up the special sauce
The following ingredients should scale nicely with those five hefty heads of cabbage. Halve, double, or triple as needed.

Have all this stuff at hand and prepped:
- 2¾ cups cold water
- ⅓ cup sweet rice powder
- 25 cloves garlic
- 4 garlic-clove-sized pieces fresh ginger
- 1 small Asian pear
- 1 medium onion
- 1 cup Korean salted shrimp
- 3 tablespoons sugar
- 2¼ cups Korean anchovy sauce
- 1 medium-large Korean or daikon radish, julienned
- 1½ bunches scallions, cut into ½-inch long pieces
- 1 medium carrot, julienned
- ¼ cup pine nuts
- ¼ cup toasted sesame seeds
- 4 cups Korean hot pepper powder

In a saucepan, whisk together the sweet rice powder and water. Bring to simmer over medium-high heat, whisking, then turn the flame to low, allowing the mixture
to cook a few minutes until thickened and translucent. Remove from the heat and let it cool down.
Peel the garlic, ginger, pear, and onion, and cut the latter three items into pieces roughly the size of the garlic cloves; this makes for easiest pureeing. Put all into the bowl of a food processor or blender. Add the salted shrimp and sugar, and give it a quick whir to break it up some. Gradually add the anchovy sauce, then puree the whole thing completely.
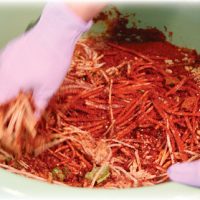
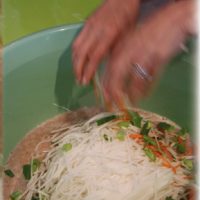
Put all the remaining ingredients in a large bowl. Add the crazy puree you just made and the rice porridge and mix it very thoroughly. Using your hands is easiest, but, unlike her palate, Og’s skin is quite sensitive to the hot chile powder, so she dons gloves from here on in.
(This is also the point where Og says, “You have to taste it now,” which is great if you know what you are after; I console myself by noting that any adjustments she makes at this point seem to be minor, like a tablespoon of sugar or maybe another splash of anchovy sauce.)
Phase IV — Slathering
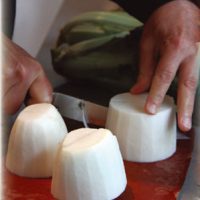
Have the container you plan to ferment the kimchi in standing at the ready. Wearing gloves if you like, take up a napa cabbage section and fan the leaves out a bit so that you can liberally smear the chunky sauce on every surface. Sort of compress the piece into a compact, orderly bundle and place it in the container. Repeat with all the rest, trying to use up the components at more or less the same rate. Pack everything in snugly together and make sure that there’s plenty of sauce on top, and preferably not too much headspace.
Og’s husband, Brian Lee, is a huge fan of adding radishes at this point. They’re darn good, so if you have the room and an extra radish or two, try this: Peel the radish and cut into chunks the size of halved baseballs. Roll in additional Korean hot pepper powder and bury willy-nilly among the cabbage. They will ferment along with the cabbage, but take a little longer to ripen just right; follow your own taste, experiment and enjoy.
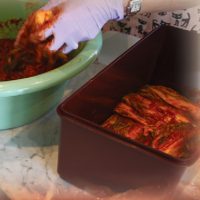
If your container gets full, you can start another one, or, if you have just a few spare cabbage sections, put them aside for a celebratory new kimchi supper. Make a pot of rice, slice up the new kimchi, and enjoy. (Preferably with slices of tender simmered pork belly, leftover kimchi-making sauce and brined cabbage leaves, accompanied with perilla leaves, hot pepper and salted shrimp, a.k.a Pork Bossam, the traditional kimchi day celebratory meal….but now we’re getting into another story…)
Phase V — Fermentation, storage, and serving
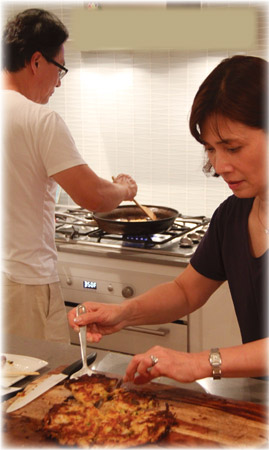
Og Lim and Brian Lee work as a seamless pair in the kitchen, frying crispy, delicious mung bean pancakes for lucky guests.
Cover the kimchi container and let sit at room temperature for at least one, and up to three, days: less time in very hot weather, more when it’s cold in the house. You can, in fact, you must, taste it from time to time to keep tabs on its development, if only to school yourself on its mysteries. Og and Brian acknowledge that personal taste is a major factor when it comes to fermented flavors, but they agree that as a general rule kimchi is wonderful new, and then fully fermented, but just not that great in between.
So, taste and see what appeals to you. Once the kimchi has matured as you like it, pop it in the fridge. The cool temps drastically slow down, but do not terminate, the fermentation process; the cultures are still alive, and it just keeps on working but at a very restrained pace.
To serve, pull a piece of kimchi out, place it on a cutting board, and slice it neatly crosswise into 1-inch ribbons. Preserving the overall shape of the section, transfer it to a serving plate. If you have included the optional large radish hunks, slice them crosswise, too, into ½-inch slabs, and arrange around the kimchi.
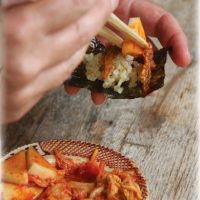
Kimchi is on the table at pretty much every Korean meal, but when Og wanted me to taste, really taste, a batch we had made the previous week, she did this: she took a piece of crispy roasted seaweed wrapper, bundled up a little hot rice and the kimchi that needed tasting and popped it right into my mouth. Wow. Let’s just say that simple idea really works.
Mung Bean Pancakes
Besides being the universal accompaniment, kimchi is used as an ingredient in soups, stews, noodles, fried rice, and marinades. And then there’s this great appetizer. Start the day before, as there’s overnight soaking to be done.

- 1½ cups dried skinned mung beans
- 1 cup dried bracken (a.k.a. fernbrake or gosari), optional
- 4 ounces ground pork
- 2 garlic cloves, minced
- 2 teaspoons toasted sesame oil
- Salt and pepper
- 1 cup well-fermented napa cabbage kimchi, chopped
- 2½ cups mung bean sprouts, washed and drained
- 4 scallions, chopped
- 1/2 medium-sized onion, thinly sliced
- 4-6 Korean hot green peppers (if not available any other hot peppers may be used), chopped
- 2 teaspoons salt
- Vegetable oil for frying
Dipping sauce:
- 2 tablespoons soy sauce
- 2 tablespoons rice vinegar
- 1 teaspoon toasted sesame oil
- Korean red pepper powder
- 1 teaspoon roasted sesame seeds
The evening before, rinse the dry mung beans. Place in a medium bowl and cover by three inches with cool water. Rinse the bracken and cover with cold water in a saucepan.
Next day, drain the bracken and cover with new water. Bring to a simmer and cook 30 minutes. Drain again and cover with fresh water for another few hours’ soak. Cut it into 1-inch lengths.
Drain the mung beans. Grind them in a blender or food processor using as little water as possible. (Do not make the batter too thin and creamy.) Transfer to a large bowl.
Mix the ground pork with the garlic, sesame oil, a fat pinch of salt and some freshly-ground pepper. Let it sit for 30 minutes, then add the seasoned pork to the batter, along with the chopped kimchi, bean sprouts, scallions, onions, hot green peppers, and salt. Mix it very well.
Heat a skillet over medium-high heat. Add 1 to 2 tablespoons vegetable oil. Ladle in about 1 cup of batter and spread it quickly to make a nice 6” to 7” round pancake. Cook until the bottom turns light golden brown and crispy; 2 to 3 minutes. Turn it over and cook the other side.
Transfer to a cutting board and cut into wedges. Stir together the dipping sauce ingredients and serve to your guests as you fry the remaining pancakes.
Makes 6 hefty and irresistible pancakes, serving 10–12.
Paula Marcoux is a food historian who lives and works in Ellisville, the K-town section of Plymouth. She homesteads vicariously by mining the hard work and knowledge of her friends.

